9. 설치 완료 후 set PYTHONPATH=. set CUDA_VISIBLE_DEVICES=0
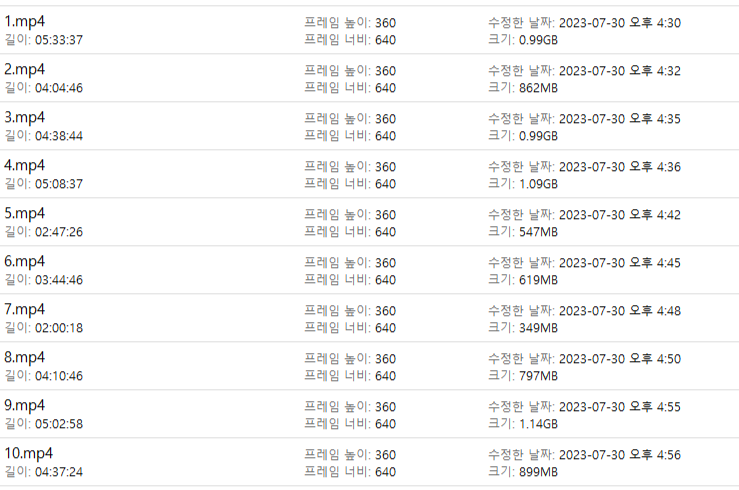
10. 학습용 파일 10개 제작. (자료 찾고 받고 만드는데만 4시간 쓴듯..)
다시보기 파일을 준비해서
적당히 노래부르는 부분을 자른다.
- 내가 가진 영상 편집 프로그램이 따로 없어서 윈도우에 탑재되어 있는 프로그램을 썼더니 해상도 최저치가 540이라 시간을 많이 잡아먹음.. (10번같은 경우 짧아졌는데 용량이 더 커진다던지 이런일이 생김 ㅠ) - 이제와서 생각해보면 에코나 배경음이 안들어간 그냥 말하는 부분도 준비하는게 좋았을듯
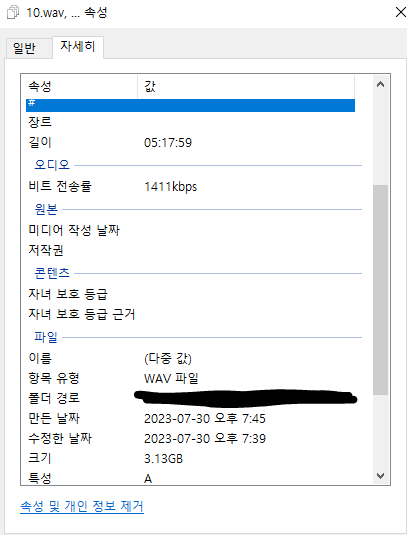
자른 영상에서 오디오만 추출
준비된 데이터들
11. preprocess 폴더에 제작한 학습용 파일들 다 넣음
12. 걍 python sep_wav.py 때림
15. training폴더의 config_nsf.yaml에서 설정을 바꿈 - config_nsf.yaml 파일 내용 (아래 내용들은 바꾸기 전 내용들. 항목 참고용으로 남김)
config_nsf.yaml ################################################################################## ## original wav dataset folder ## 3번에서 자르고 변환한 결과 wav파일들을 학습데이터로 만들기위해 넣어줄 폴더 이름 raw_data_dir: data/raw/test ## after binarized dataset folder ## 위 폴더에 있는 학습데이터들을 실제 학습에 사용하기위해 binarize한 결과물을 저장할 폴더 binary_data_dir: data/binary/test ## speaker name ## 이건 나중에 결과물 뽑을 때 쓰게될것 speaker_id: test ## trained model will be save this folder ## 학습데이터로 학습한 모델을 저장할 장소 work_dir: checkpoints/test ## batch size ## 모델이 한번에 학습할 양을 정한다 (CUDA out of memory에러가 나면 이 숫자를 줄이면 된다) max_sentences: 10 ## AMP(Automatic Mixed Precision) setting(only GPU) for less VRAM ## AMP를 사용할것인지 설정, 학습시간에 차이는 없지만, 한번에 더 많은 batch를 학습시킬 수 있음. use_amp: true load_ckpt: checkpoints/nehito_44khz/nehito_ckpt_steps_1000000.ckpt ##################################################################################
14. preprocess_out 폴더 하위의 final, voice 등 폴더에 파일들이 생성되어 있는데, voice폴더의 파일들이 적합하지 않을까 싶어서 이것들을 위에 설정한 raw_data_dir폴더로 옮겨줌
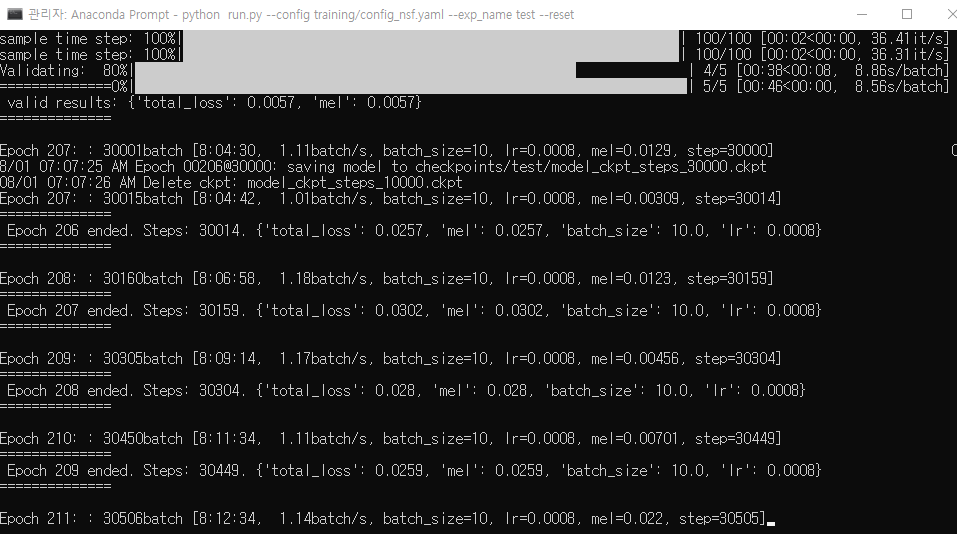
16. python run.py --config training/config_nsf.yaml --exp_name test --reset (자기 직전에 시작해서 출근 직전까지 8시간 정도 돌리다가 일단 종료하고 출근함. 대충 30,000 스텝 좀 넘게 돈걸로 기억) python run.py --exp_name test로 재시작 확인까진 함
23.07.31 - 2일차
퇴근하구 가서 마저 해보자. 참고한 글들을 다시 보다보니 위의 작업에서 model을 nehito를 사용했는데, 여자 목소리는 liee가 더 적합하다는 듯하다. 결과물을 일단 보고 이상하면 다시해보자.
학습 돌리다가 어느 순간되면 띵! 하고 끝나는 줄 알았는데 아닌가보다. 집에가서 결과물을 한번 뽑아보자
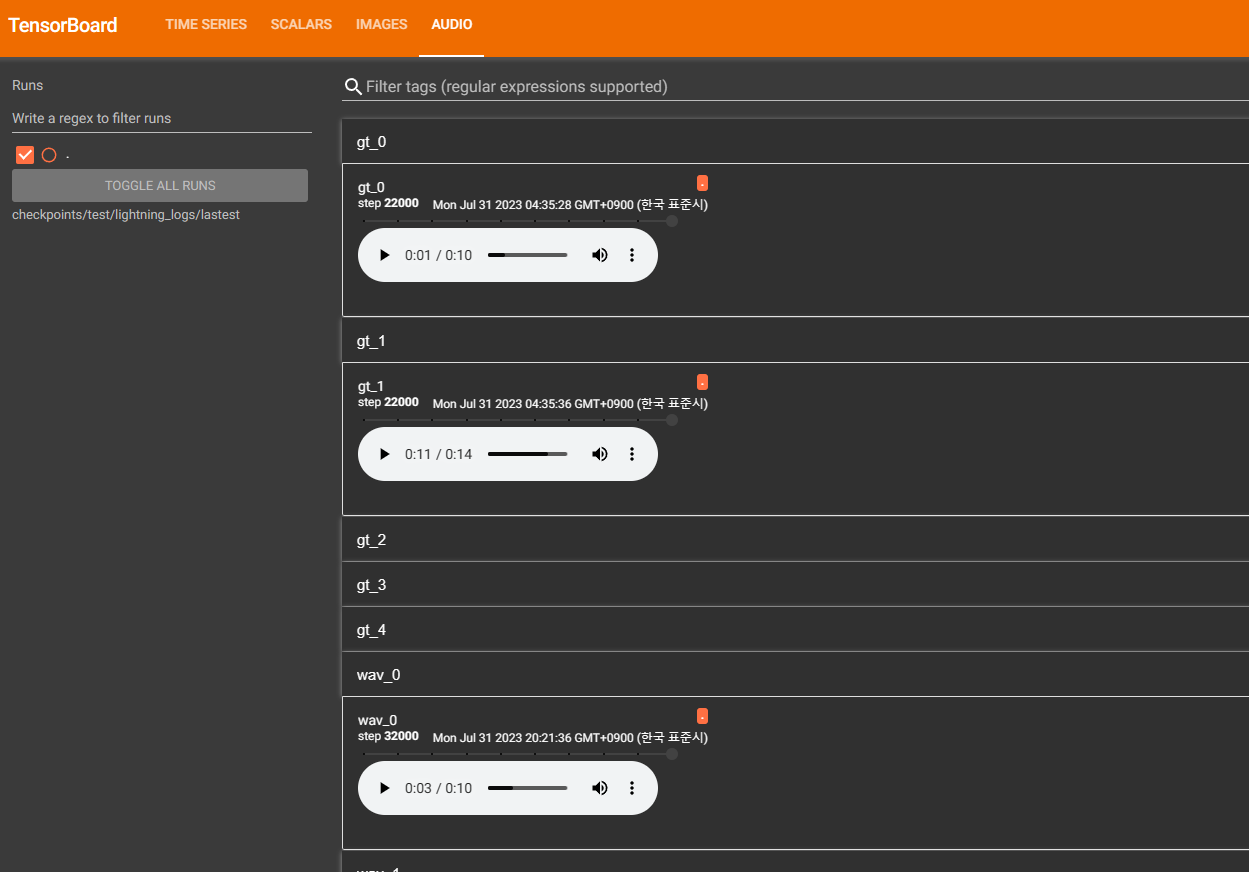
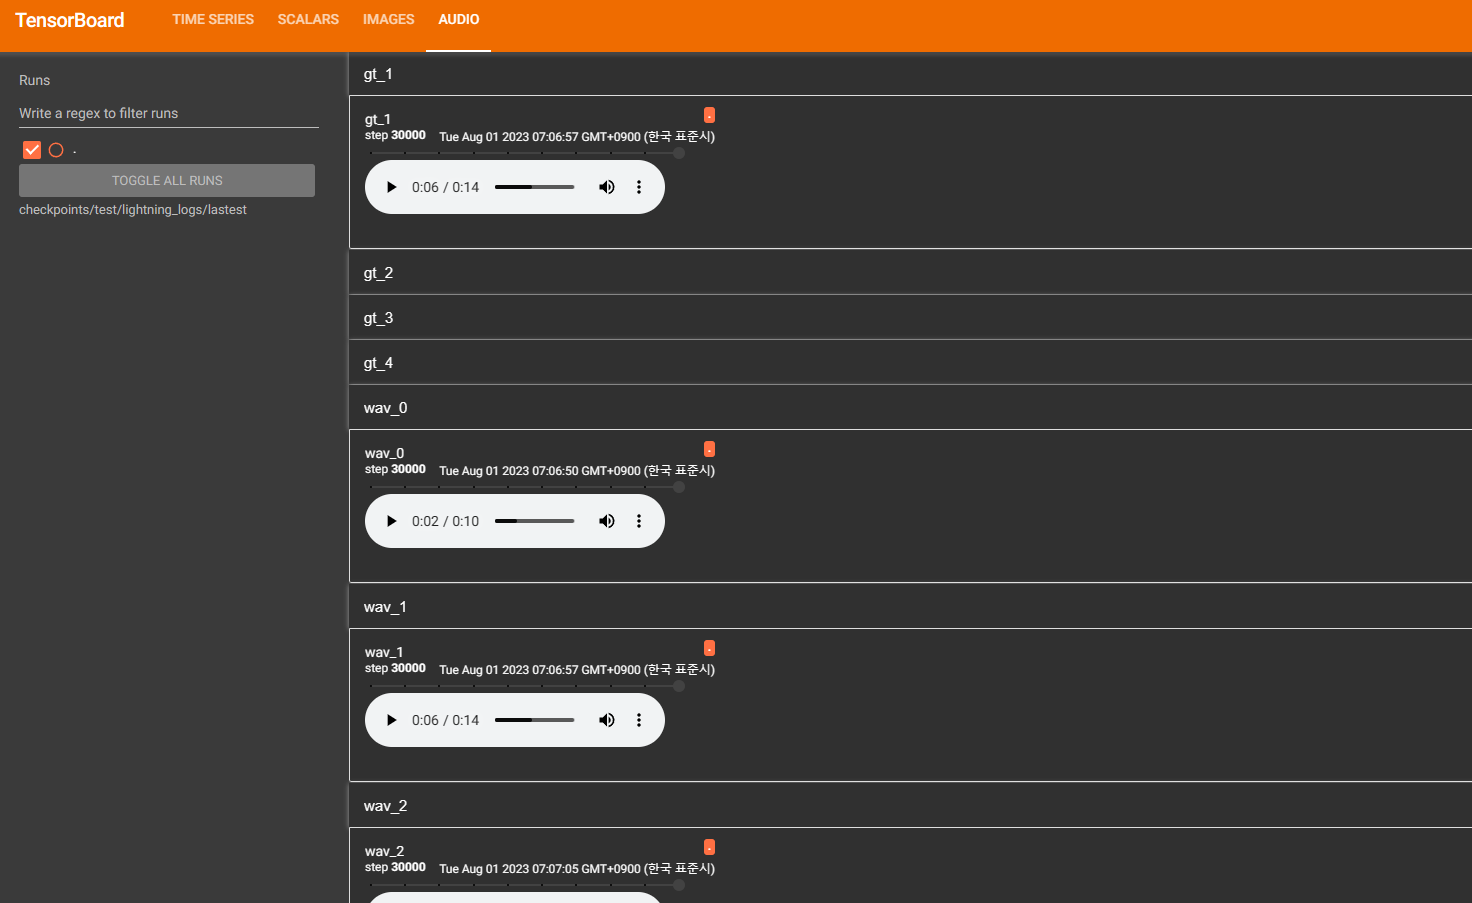
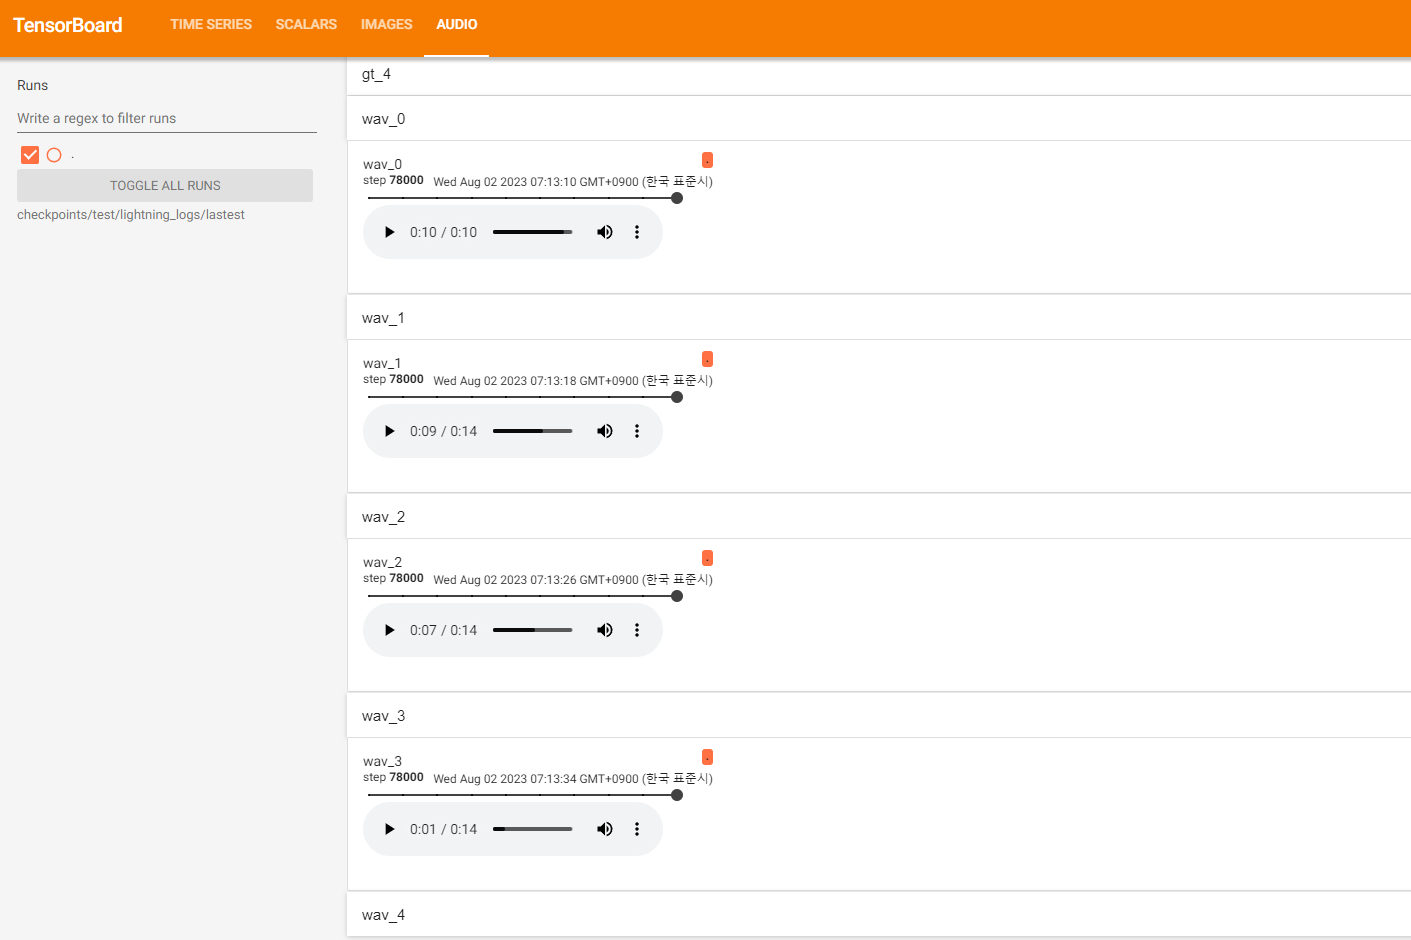
* Tensorboard 일단 시각화해서 보는게 편할듯해서 Tensorboard 설치함
pip install tensorboard

# 설치 후
tensorboard --logdir=checkpoints/test/lightning_logs/lastest
There is a good descrption about how to remote profiling on device on Unity Manual page (Link). However, sometimes it doesn’t work like that if you miss some parts or mix the procedure. This is easy steps you can follow.
Build with option check ‘Development Build’ on Build Settings. (빌드 세팅에서 Development Build 체크해서 빌드하기)
Install the app just built. (디바이스에 앱 설치)
Check the cable connection between PC/Mac and the device. (케이블이 컴퓨터와 디바이스사이에 잘 연결되어 있는지 확인)
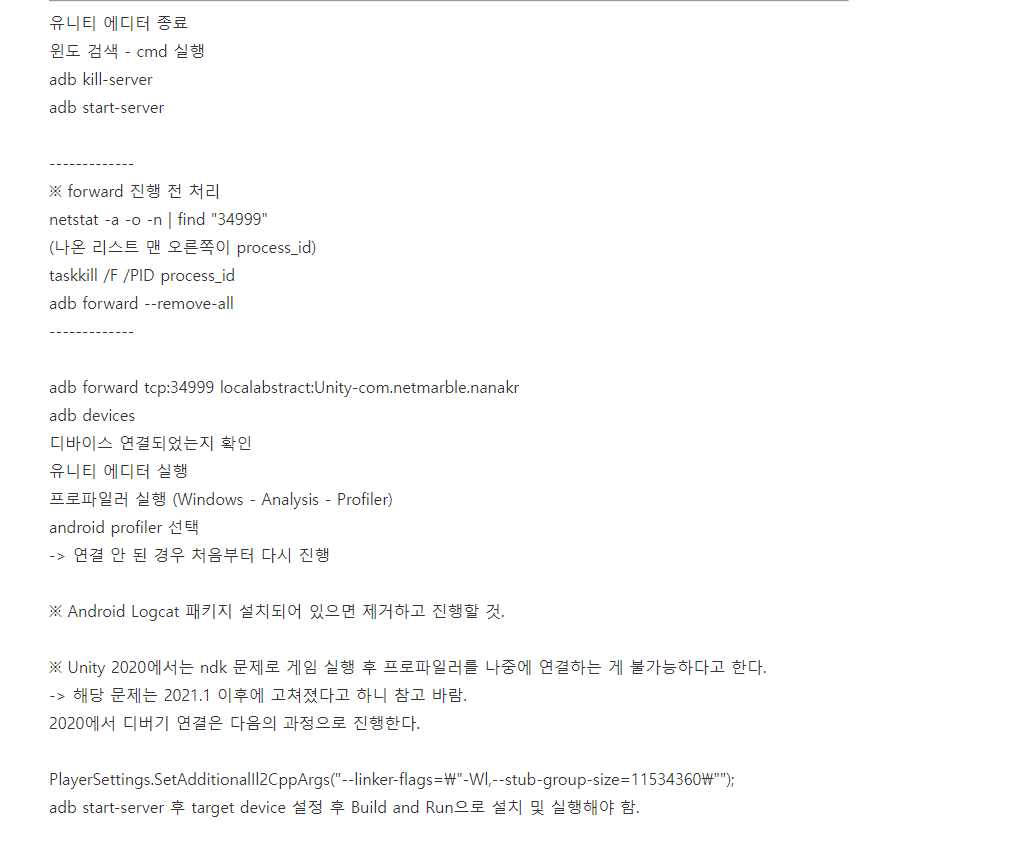
Open any command console on PC/Mac (커맨드창 열기)
Check if the device is detected through adb command. (아래 명령어를 쳐서 디바이스 인식 확인)
> adb devices
if any device is not attached, you should check if the device driver is installed properly.
Open adb tunnel between Unity Editor and the installed app (유니티 에디터와 앱 사이에 adb 터널링 만들기)
if unity version is under Unity 5.x, then port number is 54999. (5.x 버전일 경우 포트 54999)
Start Unity editor. (Don’t start Unity editor before adb tunneling) (유니티 에디터 시작. adb 터널링 전에 유니티 에디터를 먼저 시작하지 말것)
Open Profiler window ( Unity top menu: Window > Profiler ) (프로파일러 윈도우 열기)
Select the AndroidProfiler(ADB@127.0.0.1:34999) on Active Profiler dropdown menu (Active Profiler 드롭다운 메뉴에서 AndroidProfiler 선택)
Profiler dropdown menu
You should see cpu, memory, and various graphs from there. (그래프들이 표시되면서 프로파일링이 잘 되는지 확인)
If not showing any graph, or if active profiler is not AndroidProfiler(ADB@127.0.0.1:34999), then follow below steps. (만약 그래프가 안보이거나 AndroidProfiler가 선택이 안되다면,)
Stop/close Unity editor process completely. (RESTART STEP) (유니티 에디터 종료)
Select the AndroidProfiler(ADB@127.0.0.1:34999) on Active Profiler dropdown menu. (Active Profiler에서 AndroidProfiler 선택)
You should see various graphs now. (프로파일링 되는지 확인)
You might disconnect the tunnel if you unplug your device from PC/Mac. Then follow steps from “RESTART STEP” again. (디바이스를 컴퓨터에서 뽑았을때 터널링이 끊겼을 수 있으므로 RESTART STEP으로 부터 다시 세팅)
If you are still not seeing any profiling results, then check firewall port settings. (그래도 안되면, 방화벽 포트 세팅 확인)
(Windows) Control panels > System and security > Windows firewall > Advanced settings